Facebook Access
In order for us to manage your Facebook Ads to drive more leads, you will need to follow these steps to give us access to your account.

Step 1: Visit Meta Business Settings
Visit Facebook Business Manager, make sure you are in the right business account and click on settings gear on the bottom left. If you don't have a Facebook Business Account, or can't find your Business Settings, please give us a call.
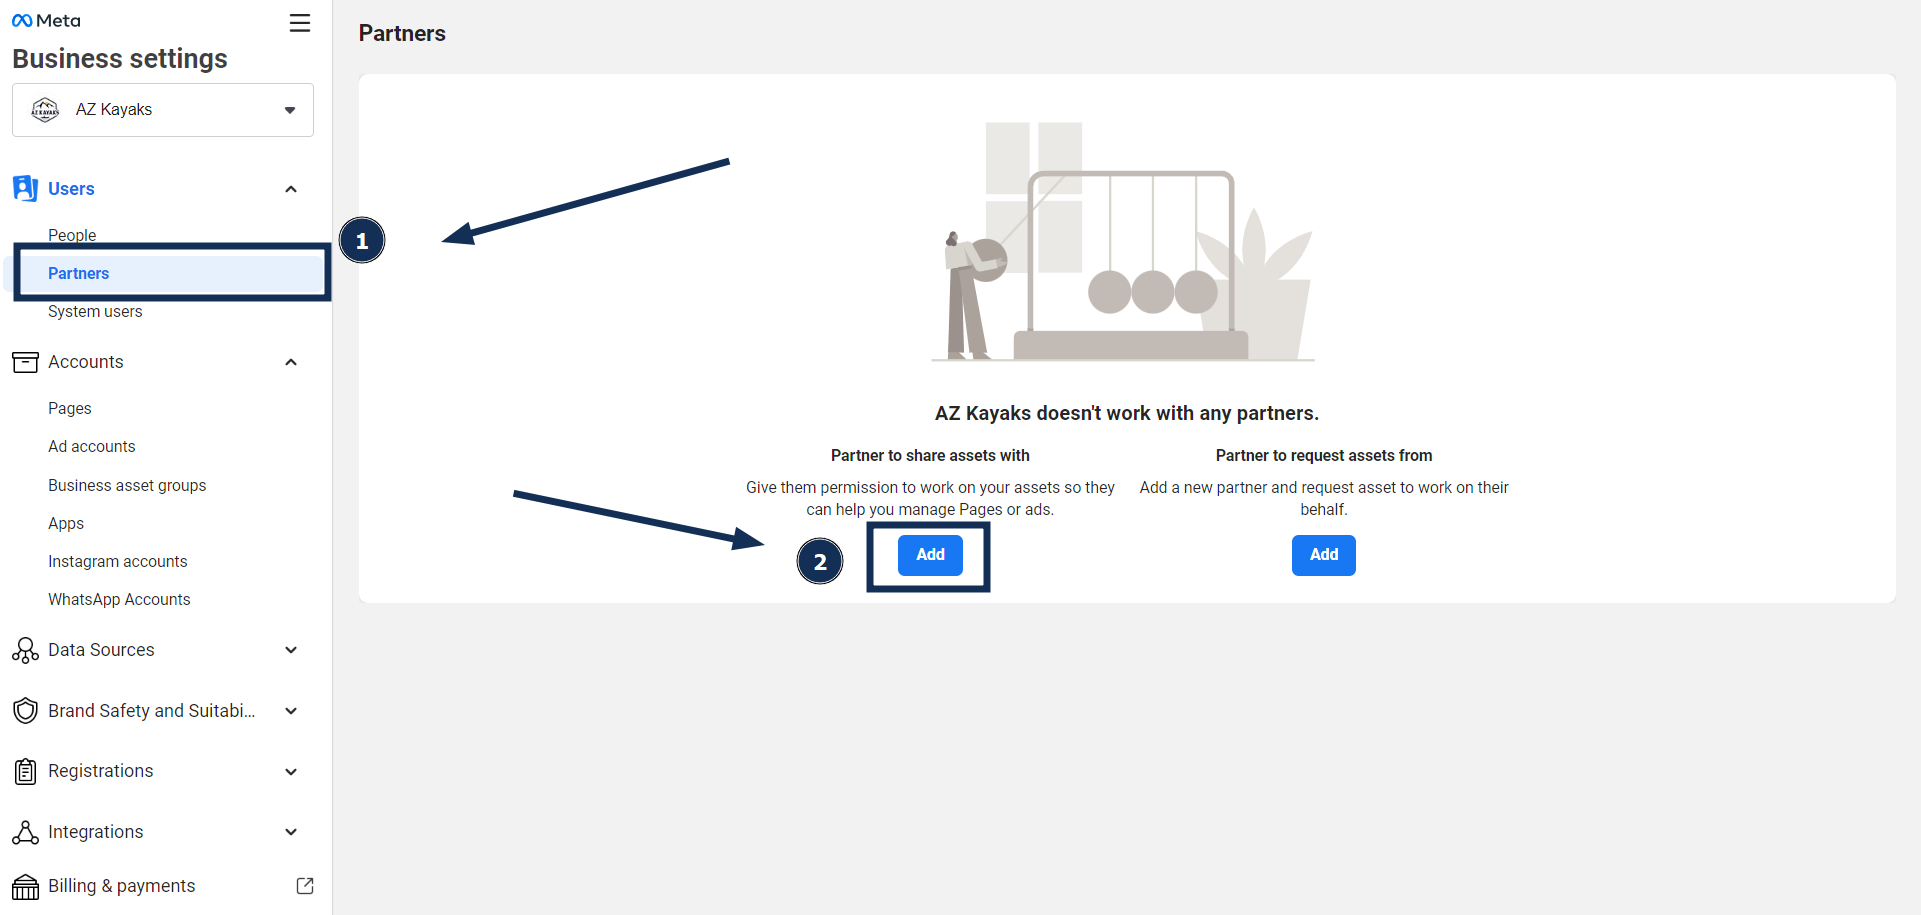
Step 2: Navigate to partners
Select "Partners" on the left tab, and then "Add".
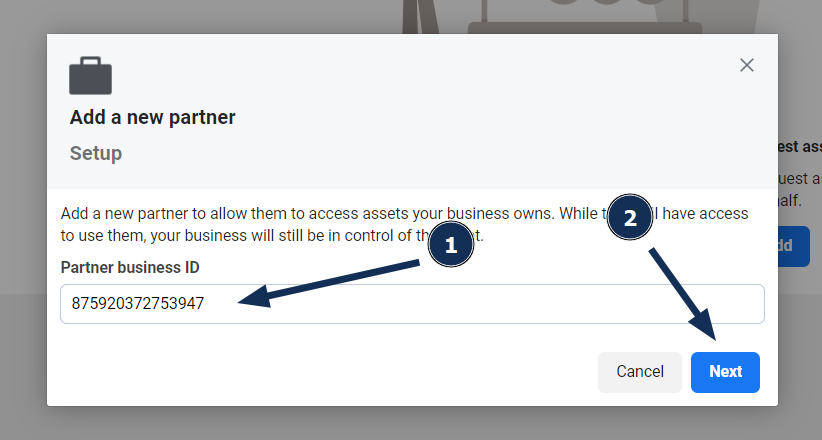
Step 3: Add OrthoBoost as a partner
Enter 875920372753947 into the text field and click "Next".
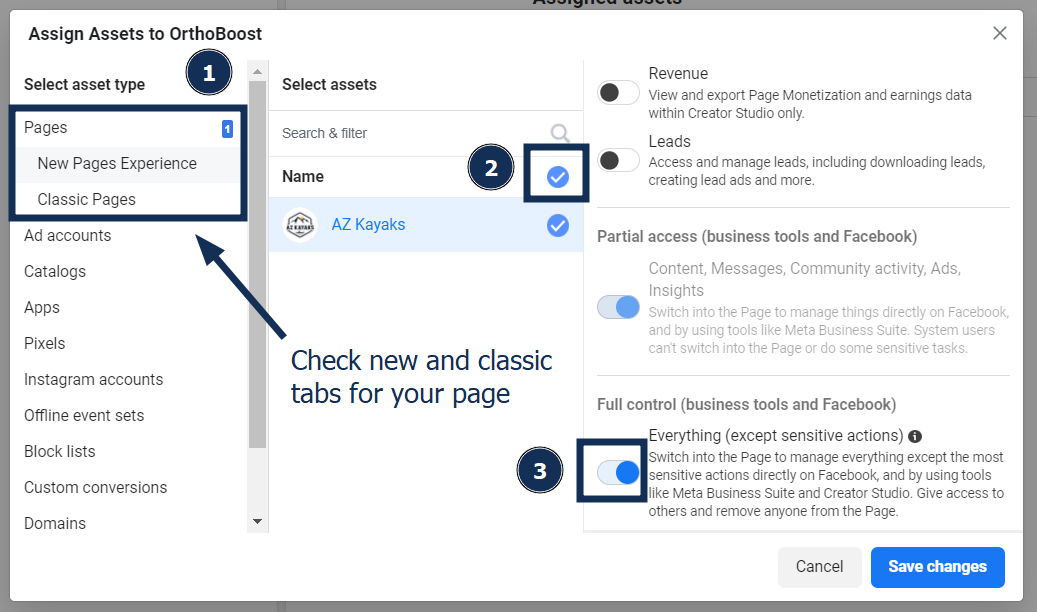
Step 4: Give access to FB Page
Check "New Pages Experience" and "Classic Pages" for your FB Page, and allow "Full Control".
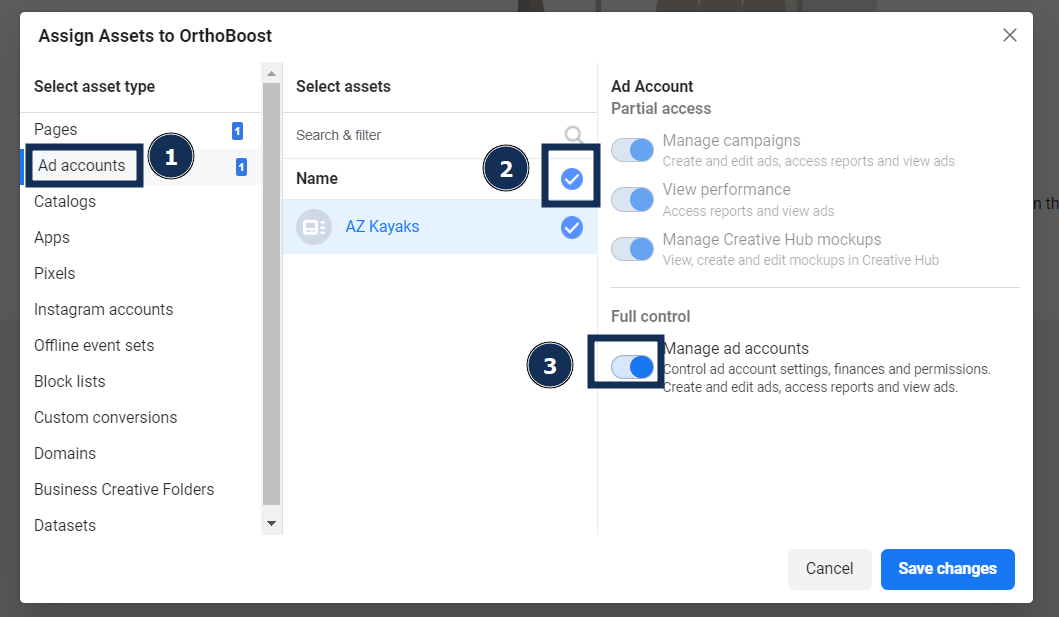
Step 5: Give access to Ad Account
Under the "Ad accounts" tab to select your Ad Account, and allow "Manage Ad Accounts". IF you don't have an ad account, don't worry, we can always set one up for you later.
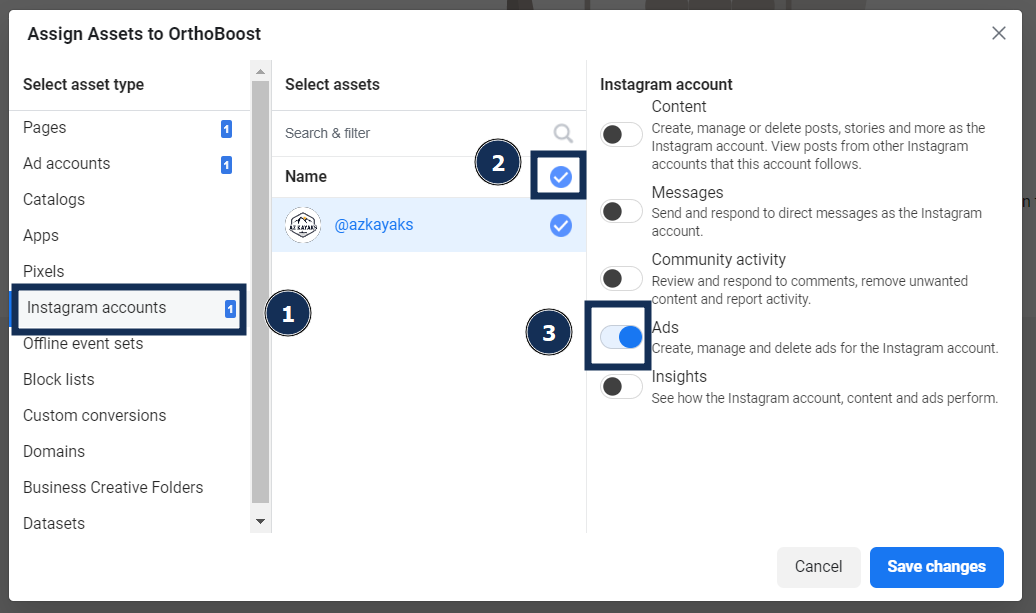
Step 6: Give access to Instagram Account
Under the "Instagram accounts" tab to select your Instagram Account, and allow "Ads". We highly recommending connecting your Instagram if it's not already. You can do that by finishing the steps, connecting your instagram account, then assigning us access to your Instagram account through the partners tab.
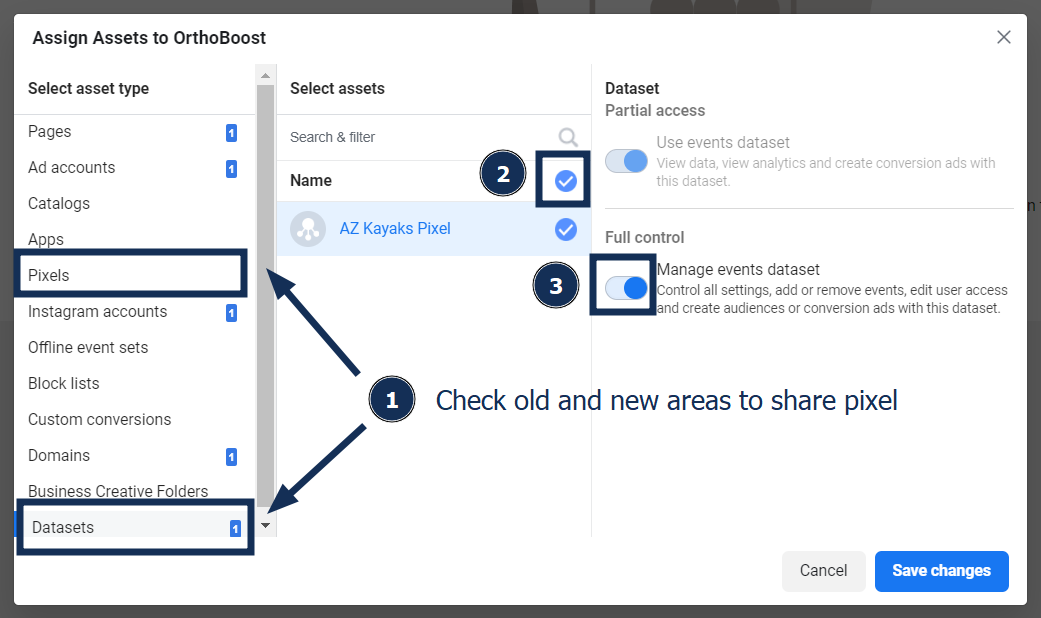
Step 7: Give access to tracking info
Check for your pixel under the "Pixels" or "Datasets" tabs to select your Pixel, and allow "Manage events dataset". If you don't have a pixel, don't worry about it. We can create one for you later.
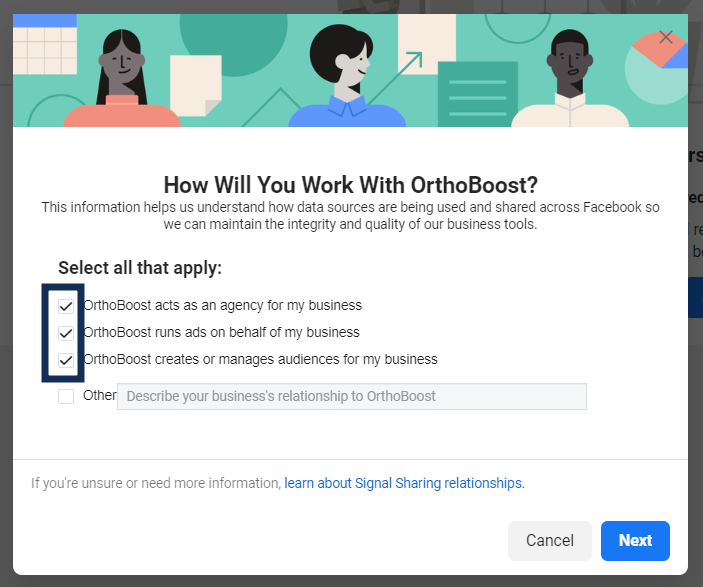
Step 8: Toggle all sharing options
Check all the boxes and click "Next".
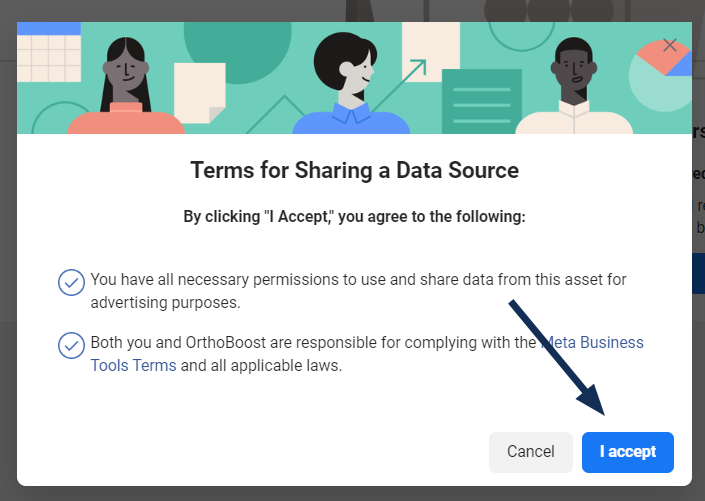
Step 9: Agree to terms of sharing
Accept the terms for sharing a data source.
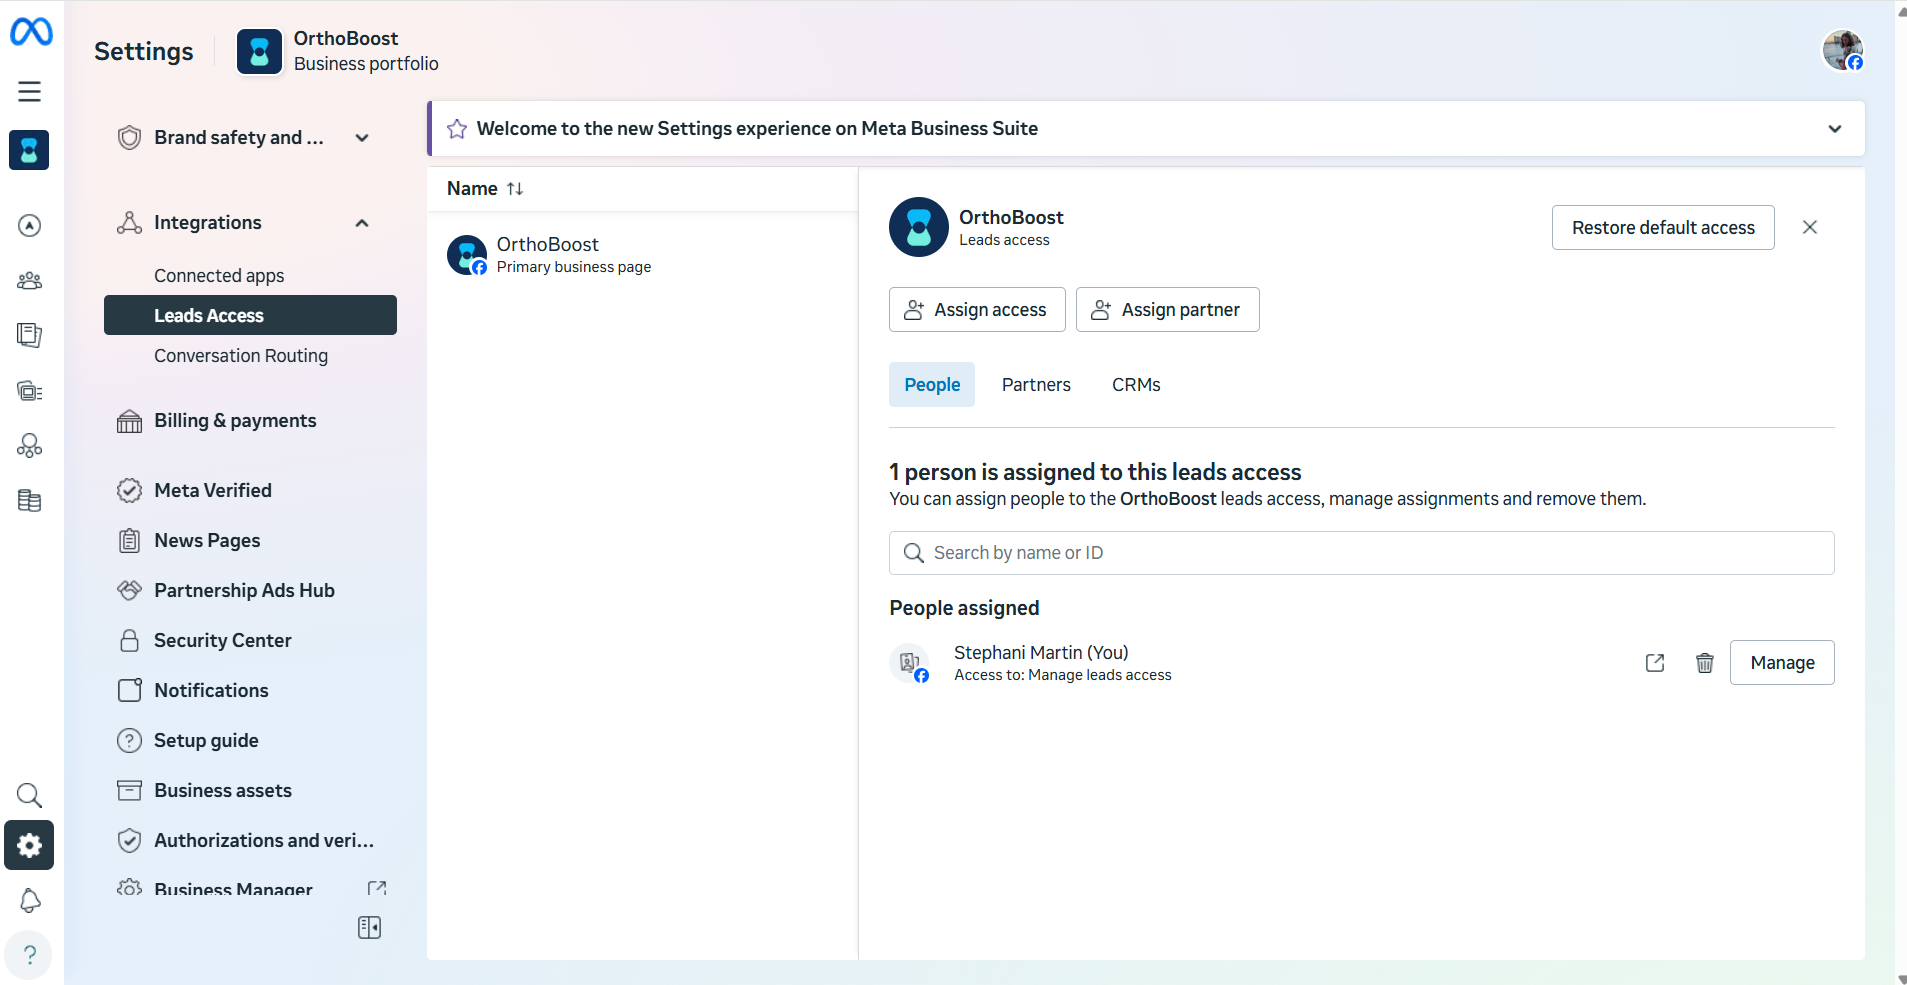
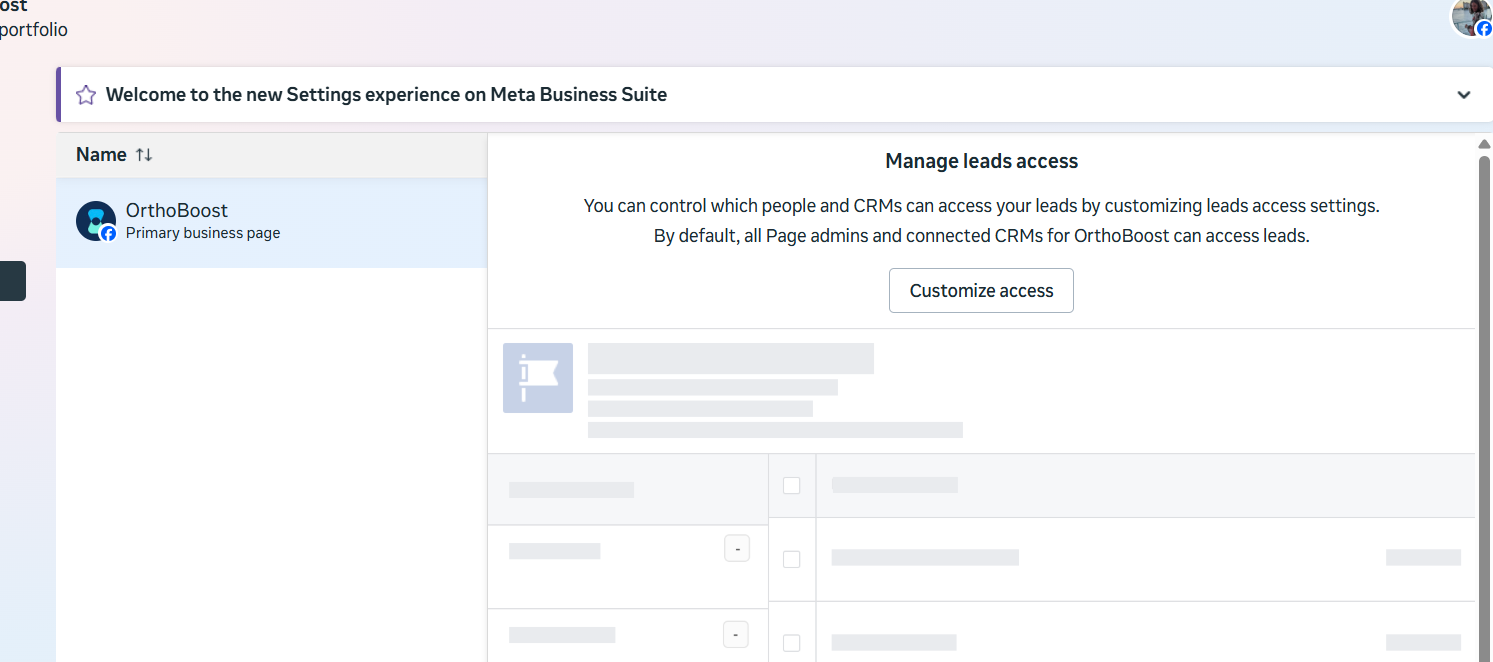
Step 10: Navigate to leads access
Navigate to `Integrations` on your left menu, then click on `Leads Access`. You should see a list of Facebook pages you own. Click on your Facebook page(s), and on the top right, click on the button that says `Resore default access`. If the button isn't there and it looks like step 12, the page is configured correctly and you are done.
Step 11: Restore leads access to default
When the popup shows up, confirm `Restore Default`.
Step 12: Confirm visually
It should look like this when done.